What Is The Pool Construction Process?
by: Blueline Pool Construction
Published: May 27, 2022

Are you excited to build a brand new swimming pool in your backyard this summer? We don't blame you. However, you must remember that your pool won't be ready right away. That's why we have put together this comprehensive list so you can learn more about What is the pool construction process?
When hiring a pool contractor and starting on a new swimming pool project, the construction process will take several weeks (10-16 on average), so you need to plan if you want to start swimming once summer starts.
Below we walk you through the 14 steps required for a pool installation. Most of these steps can vary in time, depending on the weather, scheduling conflicts, and other factors.
Step 1: Finalizing Permits and Pool Construction Plans
Before pool installation can begin, construction permits need to be secured and comply with all state, local, and HOA requirements. First, detailed construction plans need to be sent to the HOA for approval.
Keep in mind that some HOAs only meet a couple of times a month, so this can delay the start of the pool construction.
Once your HOA signs off on your plans, you can submit the appropriate paperwork to your local municipality. It is not uncommon for a pool contractor to have to make edits and corrections to the plans before approval.
Step 2: Excavation
Once the permit has been approved and you have finalized the layout and design proposed by the pool contractor, the excavation process can begin.
The excavation crew will use heavy equipment such as a Bobcat or Backhoe to dig the pool. The team will most likely have to rearrange portions of existing landscaping and irrigation so it is important to have a plan in place for relocation of these items. We recommend hiring a landscape and irrigation professional to help restructure your existing irrigation lines.
Step 3: Plumbing and Equipment
The plumbing and equipment will give your pool the best circulation and filtration to give it the clear water you're looking for. The plumber will add all the necessary filtration equipment, including pumps and other features you requested that work for the specific design of your pool installation.
We also recommend before starting a new pool project to research what brand of pool equipment you would like. Many builders are loyal to one manufacture but that doesn't mean you need to go with that company. There are many good brands so don't be afraid to ask your contractor for options.
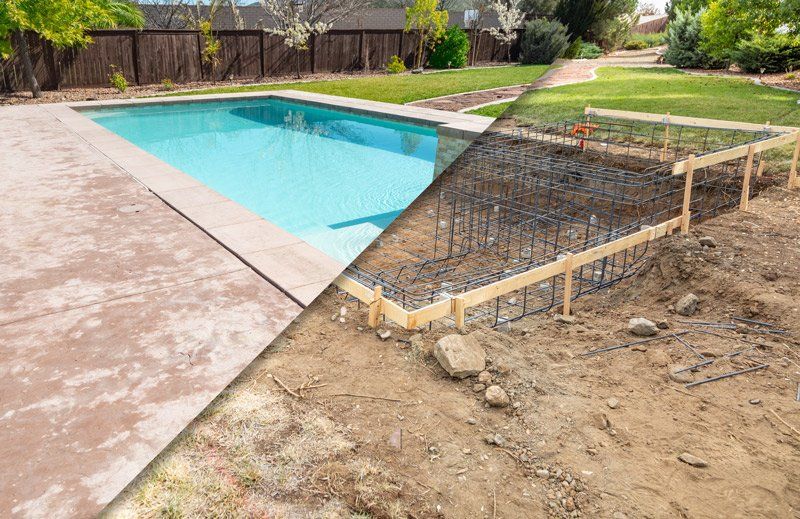
Step 4: Steel Installation
The structural steel will create a shell that will prevent cracks and defects from forming. This consists of a series of horizontal and vertical bars that are strategically engineered to fit your design.

Step 5: Electric and Gas Hook-ups
This step involves electricians trenching and installing electrical conduits from the main electrical box of the house to the equipment and other locations specified in the pool building plans.
If you plan to use a gas heater, this requires a gas line to be run. When you reach the step for the final city inspection, you may need to contact the city to have them hook up the gas line to the main meter. The pool contractor can't schedule this appointment for you, and you will need to be home, so the technician has access to the inside of the home.
Step 6: City Inspection
Before moving forward to the next stage of the pool construction process, you will need to pass a city inspection. The inspector will check to make sure all stages of work have been completed correctly to building code standards and will also check to make sure setbacks and other requirements match approved city plans.
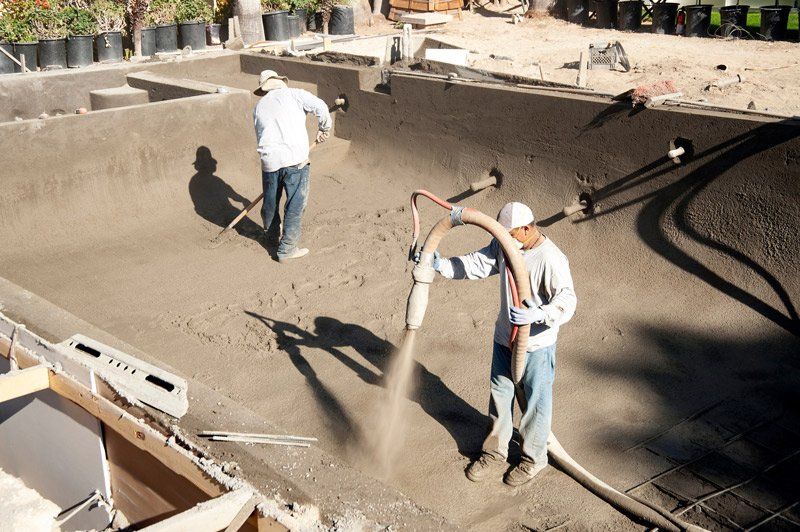
Step 7: Shotcrete
Shotcrete is concrete shot out of a high-pressure hose to create the shape of your pool. Homeowners must lightly water it 3-4 times a day to help it cure. This will take 5-7 days before it is cured enough to continue pool construction.
Step 8: Tile and Coping
The installation of the waterline tile, pool edge coping, and other materials such as stacked stone on raised bond beams will take place next. The length of this step depends on the number of features to be added and their complexity. Your pool contractor should help you in selecting these materials that best fit your budget and availability.
Step 9: Decking
When it comes to decking, you have multiple options including: concrete, pavers, tile, turf, and more. Depending on the type of materials used for the deck, the total square footage of the surface area and other element such as built in bbq islands and lounge area, this process can take a couple days to a couple weeks. You pool contractor should be able to provide you will a ballpark estimate for completion.
Step 10: Outdoor Living Features
This step includes constructing any outdoor features, including:
- Outdoor kitchen or BBQ area
- Fireplace
- Sitting areas
- Any features you choose to include in your pool building design
The time required to complete this step depends on the complexity of your chosen features.
Step 11: Final City Inspection
The last city inspection must happen before the surface can be applied. You and your pool contractor will need to be present during this inspection. You need to be at home, so the inspector has access to the inside of the house to verify that all barrier codes are followed. It's like door and window alarms, fence and gate requirements will all be checked before signing final approval to move forward.
Step 12: Cleanup
Between the completion of the inspection and the beginning of the surfacing, The construction team will clean up all of the unneeded construction materials and any mess left over from the previous pool construction steps to finish the interior.
Step 13: Interior Finish
The pool installation is almost complete and you're closer than ever to enjoying your new swimming pool. Before filling her up, the interior finish needs to be applied. The most common finish is standard plaster, usually in white or french grey. While plaster is more budget friendly, we encourage clients to look into more durable and longer lasting products like quartz and pebble. Choosing pebble as an interior finish not only provides your pool with a longer lasting surface, it also gives you the opportunity to choose the color of your water. Different pebble options such as pebble tech offer a handful of color options that can give your pool a light airy blue color or even a dark green lagoon look. Either way be sure to as your pool builder to provide you with sample and photos.
Step 14: Finalizing Permits and Pool Construction Plans
The pool contractor and the rest of the crew will start the equipment and begin to balance the water chemistry before it's safe to start swimming. The interior is filled with water as quickly as possible, and a technician will go over the equipment and care instructions for you so you and the rest of the family can take a dip.
Enjoy Your New Pool!
Now that the pool construction process is over, you can kick back and relax in the cool water in summer or all year long, depending on where you live of course. All you have to do is follow the care and maintenance instructions from your contractor, and you'll be on your way to enjoying a beautiful pool for decades to come.
Be patient and work with your contractor as they help bring your vision to life right in your backyard through the above 14 steps.
At Blueline Pool Construction we offer several different pool builder and contractor options such as new construction, remodels, and general outdoor living.
If you're ready to start a new pool construction project at your home, contact us today to learn more about getting a Free Design and Estimate.
Send Your Mail Here:
4788 Grand Ave, Ontario, CA 91762
Call or Text:
Email Us:

